Refinement Interface Video Overview
Refinement Interface Panels
The Refinement Interface has 5 panels as illustrated below

General Controls
Window size adjustment
If you wish to adjust the panel layout in the DeepEditor refinement tool, click and drag the bars on the edges of the panels to your desired height/width.

Zooming In/Out
You can zoom in on either the gray faces in the reference panel or any part of the image in the main window.
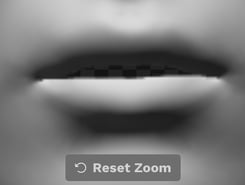
- Single mouse click on window = zoom 150%
- Click again = revert zoom to 100%
- Mouse hover over window and move the scroll wheel = zoom incrementally
- Mouse hover, click, and hold = move the image around in the window
After zooming in, a new button will appear at the bottom center of the viewer, Reset Zoom. Click to reset the position and zoom.
Header Controls

Navigation Bar
The navigation bar runs across the top of the refinement tool page and allows you to navigate to different areas of the DeepEditor interface.

Using the navigation bar you can go to any of the following parts of the DeepEditor interface (from left to right):
- Project Name - the current project name is displayed, but you can use the drop down to navigate to other projects.
- Project Settings - click on the cog to access your project settings.
- Shots Page - link to the Shots page.
- Link to Shot - this is the link to the shot for this vub.
- Project Navigation - from here you can access the Media tab, Shots tab and A.R.T. Consent tab (for editing projects only).
- Tokens Page - click to manage your token balance and purchase additional tokens.
- Help - click to create a support ticket, access the keyboard shortcuts and knowledge base, provide feedback or submit feature requests.
- Account Navigation - click on our user icon to navigate to other tenants/workspaces you have access to.
Save/Load

The Load button allows you to reload a saved refinement session – your session is saved either:
- When a render is completed, or-
- When you have manually saved using the Save button.
The Save button allows you to save and name your refinement session after making a keyframe change, but before a render.
Rename your renders in the 'Load' dialogue box to keep track of your refinement work.
Here you can also load previous renders and the Initial Render that was produced by DeepEditor when the vub was first generated.

Export latest render / Render changes

The Render changes button allows you to render any new lip sync refinements you have made, so that you can view the results in the Main Window.
The render button will only become active when refinement changes have been made on the timeline.
- When you click Render changes, the button will change to show the % progress of the render.
- When the render completes, you will see your Google Chrome tab refresh and update with the new render. The Render changes button will then revert to its greyed out state, until you make a further change on the timeline. As soon as there is an unrendered change on the timeline, the Render changes button will become active again (it will appear blue and clickable).
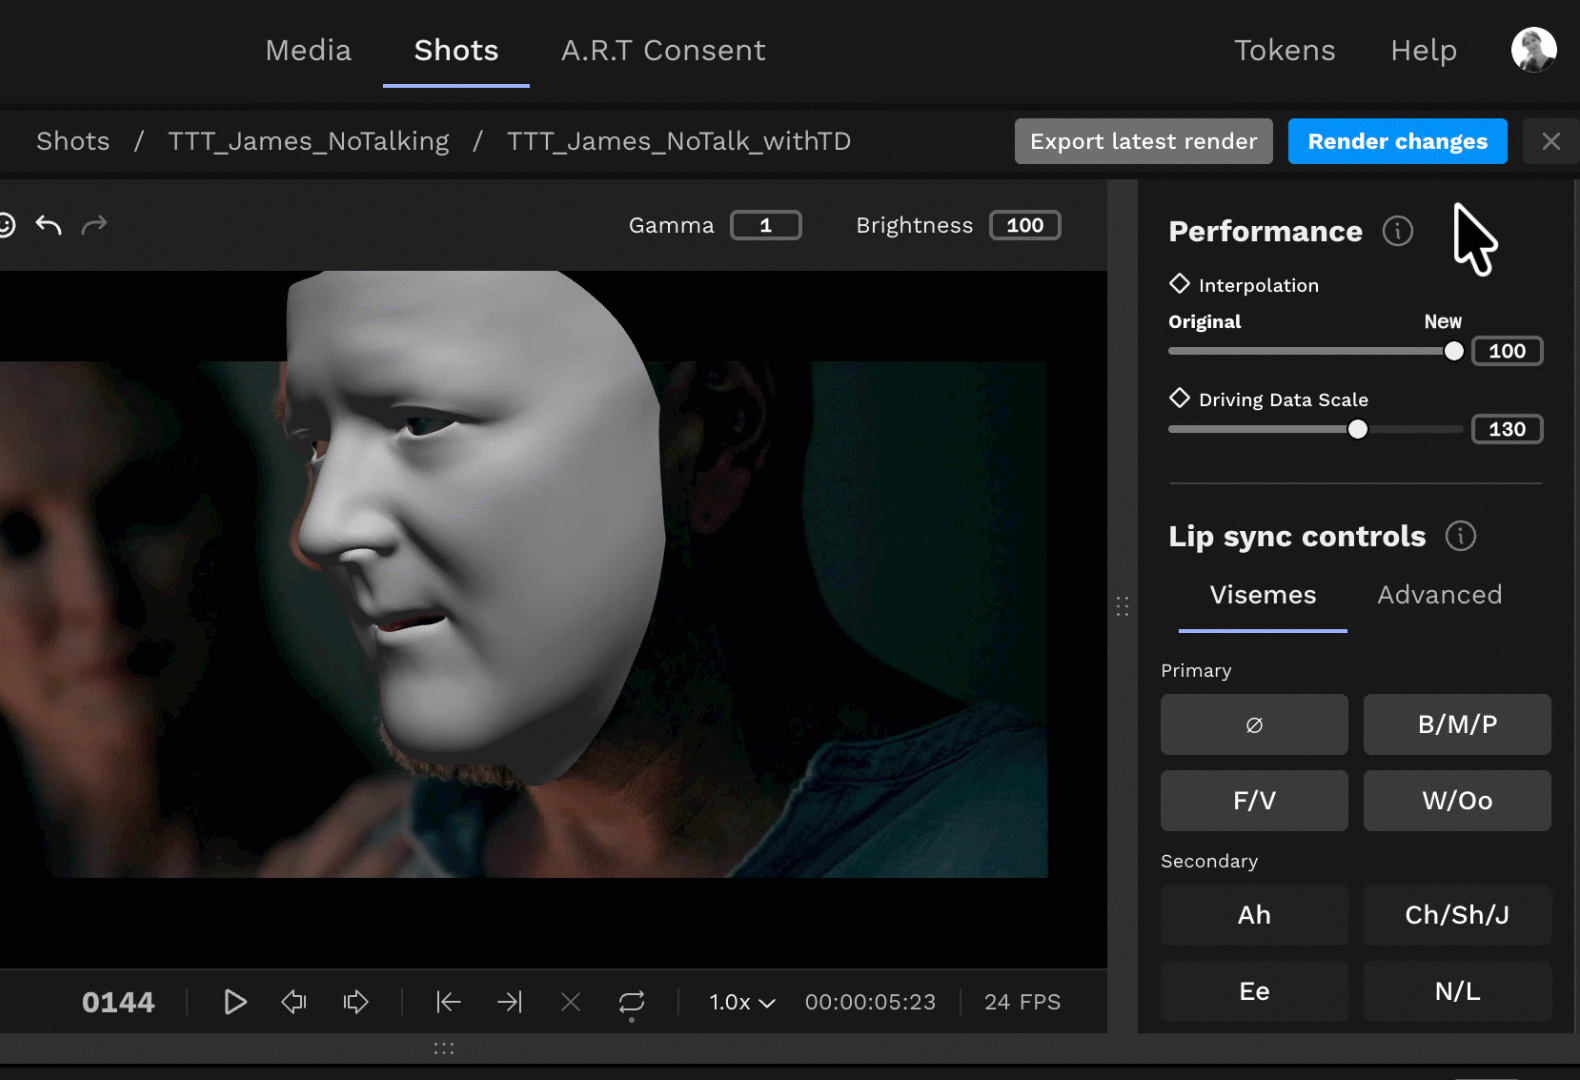
- When you start a render, you can continue making refinement changes, but these changes will require a further render when the current one completes.
- The X button allows you to cancel an active render.
Only changed frames are rendered, so the fewer the changes, the faster the render.
The Export latest render button should be used when you are satisfied with your lip sync results in the Refinement tool and want to generate an output file(s). You can download an export either to your file system or back into your Avid timeline via the Avid extension.
When you hit Export latest render, you will see several export options. The options you see will depend on the vub quality you're working with.
If you are exporting a Draft vub, you will have the Video and Slapcomp options available to you.

If you are exporting a Final vub, you will have the Video, Image Sequence, VFX Turnover Package and Slapcomp options available to you.

Here is a breakdown of each export option:
- Video: Exports a QuickTime of your vub. Choose your resolution and format (mov/mxf/mp4).
- Image Sequence: Exports an EXR image sequence of your vub.
- VFX Turnover Package: Exports a package for VFX image touch-ups if desired.
- Slapcomp: Exports your vub as an mp4 and bypasses most of the compositing steps – this is to allow you to get a faster export if, for example, you just want to send an export to someone for lip sync review.
When you trigger an Export, you will see your selected export(s) in the Exports tab of your shot in DeepEditor.
Read next: Refinement Interface - Main Viewer