Skip to content
  • There are no suggestions because the search field is empty.

Refinement Beginner Controls

Just starting? Read this article to learn about the beginner functions of the refine tool.

Timeline Playback Controls

3D Mask

Keyframes

Window Adjustment

Slapcomp Media vs Source Media views

Zoom

Undo/Redo

Navigation

Render Changes 

Save & Load Work

Export

Timeline Playback Controls

Playback Buttons 

Timeline playback controls are located at the top left of the timeline. 

Screenshot 2025-06-09 at 1.12.22 PM

Playback Keyboard Shortcuts

Spacebar = Play/Pause

Right/Left Arrows = Move playhead right/left one frame

Option + Right/Left Arrow = Move the playhead to the right/left 10 frames

Up Arrow = Jump the playhead to the first frame

Down Arrow = Jump the playhead to the last frame

3D Mask

When you open a shot, you will see a 3D gray mask on your vubbed character. 

This mask allows you to see the PT refinement you are making without rendering.

Click the icon to toggle the gray mask on and off.

Keyframes

Keyframes are markers that indicate the beginning and end of an action in an animation, effect, or motion graphic.

How do you adjust a keyframe? 

Slider Adjustment: Click and drag the slider to adjust keyframes.

Numerical Adjustment: Type in a number value, positive or negative, to adjust a keyframe.

Any adjustment made with these tools will affect the frame your playhead is resting. If there is no current keyframe, one will be created. 

Keyframe Keyboard Controls

Click + drag = create a bounding box in the timeline to select multiple keyframes simultaneously. 

Select keyframe(s) + delete/backspace = remove a keyframe(s)

Select keyframe(s) + right arrow/left arrow = move keyframe(s) to the left or right by one frame.

Select keyframe(s) + right arrow/left arrow + shift = move keyframe(s) to the left or right by 10 frames. 

Select keyframe(s) + up arrow/down arrow = move keyframe(s) up or down in value by one. 

Select keyframe(s) + up arrow/down arrow + shift = move keyframe(s) up or down in value by 10. 

Window size adjustment 

If you wish to adjust the windows in the DeepEditor refinement tool, click and drag these icons to your desired location.

Slapcomp Media vs Source Media Views

When opening the refinement page, you will automatically see the “Output Media”. If you want to see the original mouth movements of your character, you can toggle to view the “Source Media” by clicking this drop-down.

Zoom on View Windows

If you are having trouble viewing a character's mouth, especially if they are far from the camera, you can zoom in. 

  1. Mouse click = Zoom 150%
  2. Click again to revert to 100%
  3. Mouse hover and move the scroll wheel = Zoom in increments.
  4. Mouse hover, click, and hold = Allows you to adjust the picture in PT Monitor. 

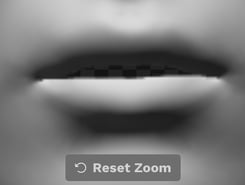
After zooming in, a new button will appear at the bottom center of the viewer, “Reset Zoom.” Click to reset the position and zoom back to standard. 


Undo/Redo

Click this icon to undo your latest timeline action. You may click multiple times to go back further.

Click this icon to redo an undone action.

Ctrl/Cmd + Z = Undo previous action

Ctrl/Cmd + Y = Redo previous action

Navigation Bar

At the top center area of DeepEditor is the navigation bar.

Screenshot 2025-06-09 at 11.44.55 AM

Render Changes

When you want to see how your refinement changes are affecting your character's real face, not just the 3D mask, hit “Render changes”.

The time it takes to render changes can differ based on the length and complexity of your vub. At present, rendering an average vub typically takes about 10 minutes.

For any reason, you can cancel a render. Just click the X button next to the render progress indicator. 

Save and Load 


Once you are satisfied with your work, click the "Save" button. You will be asked to name your save. It's advisable to include a version number in your save name. For instance: Horizon_Vub_V02.

To revert to a previous version, click “Load” and you will be asked to select an earlier version.

Export the latest render

Once you are happy with your refinement and want to see the changes in your NLE timeline, you can create an export in a couple of ways:

1. Click on Export Latest Render on the refine page.

CreateExport_RefinePreMultiface

2. Or export your latest refinements without having to re-enter the refine tool. On the Vubs page, click on the vub and select Create Export in the sidebar.

CreateExportpreMultiface

Next, read Refinement - Advanced Controls.