
-
Upgrading vs Generating a New Shot
-
Upgrading Your Vub
-
Generating a New Final Quality Shot
-
Export Your Final Quality Vub
-
Merge Multiple Exports
Upgrading vs Generating a New Shot
The most common scenario for creating a Final quality vub is:
- you have already run a Draft quality vub using proxy (e.g. Avid) media;
- you then refined the lip sync of your Draft vub until you were completely happy with it;
- you now wish to create the Final quality version of your Draft vub and to have your Draft quality lip sync refinement carried over to the Final quality vub. This process is called UPGRADING.
However, rather than upgrading, there are situations where, instead, you need to GENERATE your Final quality vub as a new shot. These situations are:
- if you are creating a Final quality vub without having already run a Draft vub version;
- if you have run a Draft vub but have decided to use different frames for your Final quality vub e.g. you are adding handles to your Source media;
- if you are going to be using different Driving Data for your Final quality vub e.g. if your Draft vub was using temp audio and you are now using final ADR.
If you are Upgrading for your Final quality vub, proceed below to Upgrading Your Vub.
If you are Generating your Final quality vub as a new shot, proceed below to Generating a New Final Quality Shot.
Upgrading Your Vub
To upgrade your vub from Draft quality to Final quality in DeepEditor, follow these steps:
If you created your Draft quality vub from your full quality media, you do not need to upload the media again, you can just proceed to running the upgrade.
Upload Final Quality Media
- Open the Shot that contains the vub you wish to upgrade.
- Then, on the Shot Media tab you should see one piece of Source media – your proxy (e.g. Avid) media that was used for your Draft vub:
- To upload your Final quality media as a second piece of Source media. Select Add Source:
- If your Final quality media is a MOV or MXF then, in the Add Source panel, select From your computer and drag and drop the media in.
- If your Final quality media is an EXR image sequence, upload via MediaShuttle using the guidance in Uploading EXRs, following the steps referring to the Shot Media page.
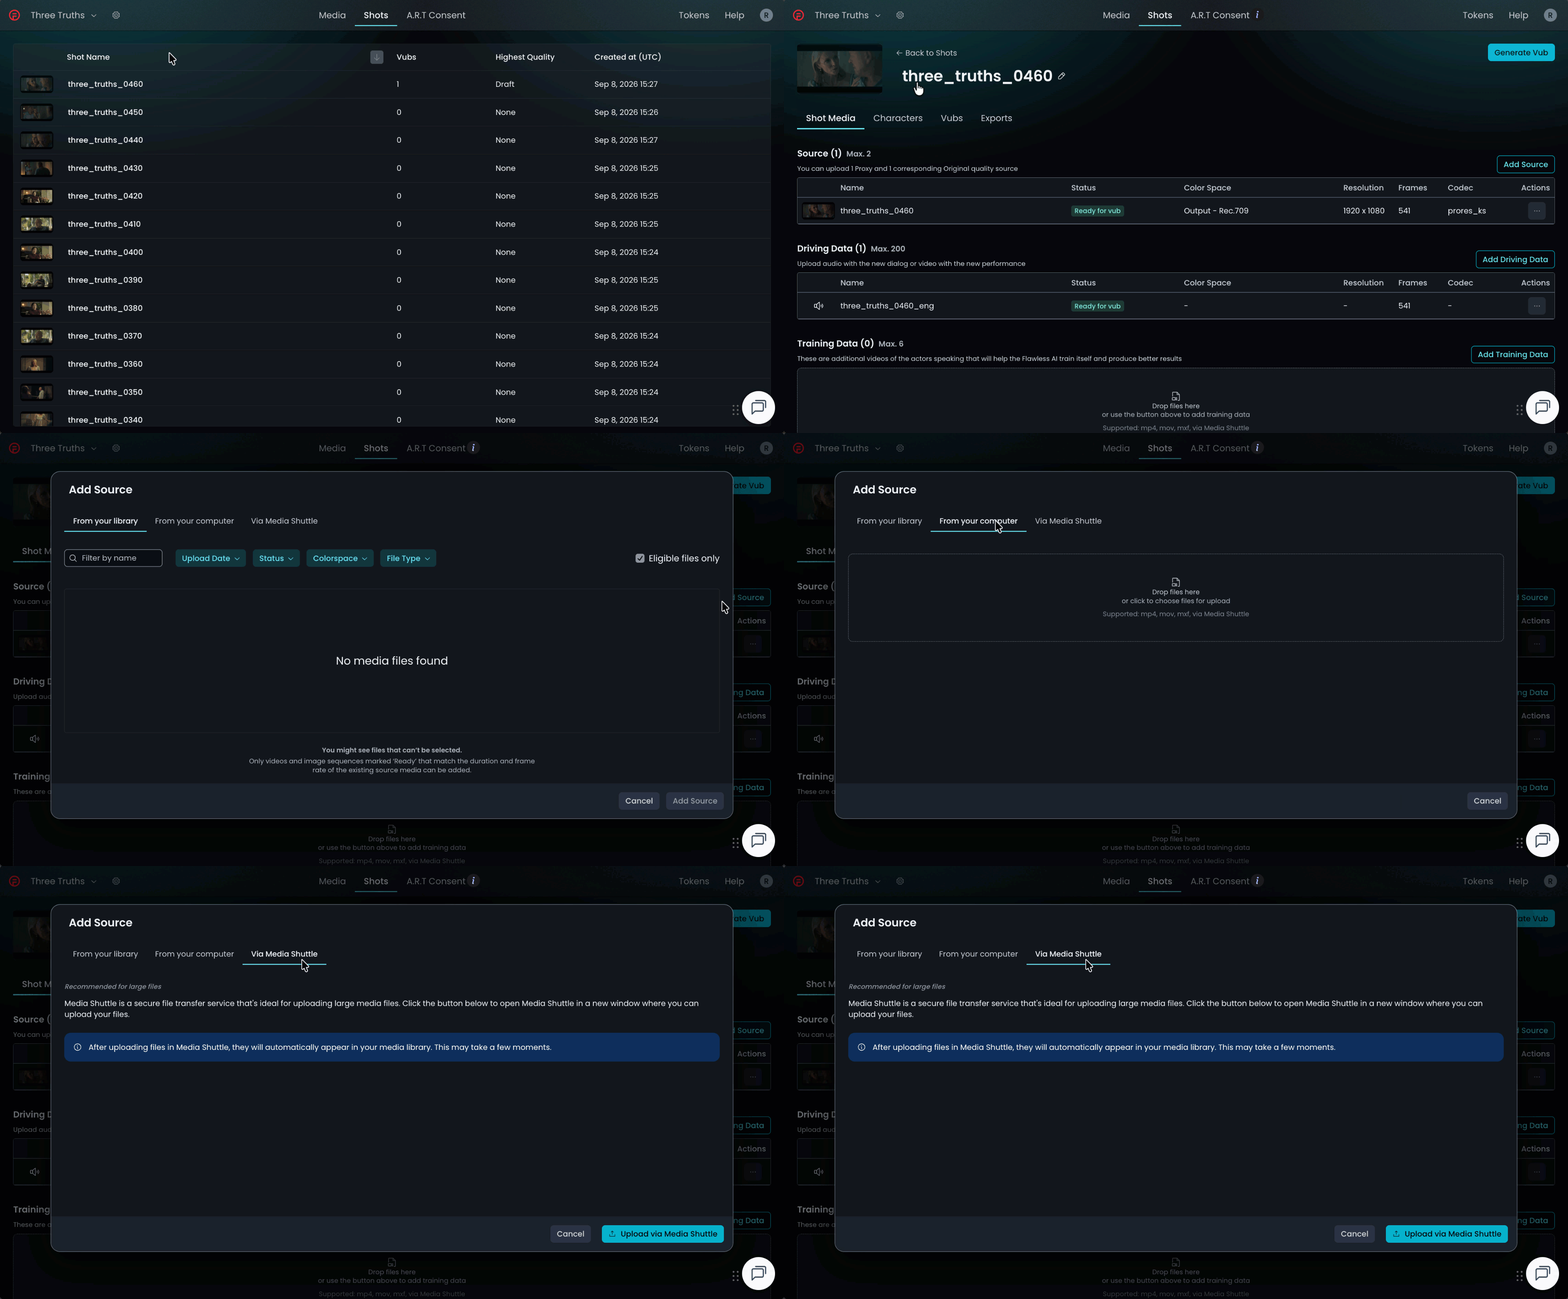
- Repeat the process in the Training Data section for adding Final quality Training Data media.
- Once all media uploading is complete and you have selected the correct color space (and if needed, the frame rate) for your Final quality media, you will now have your Final quality Source media visible in your Shot Media tab and any Final quality Training Data also listed. Wait for the status of this media to become Ready to vub.

Check Character Detection
- Go to the Characters tab and ensure that the detected face of your vub character in the Final quality media has been identified as the same character as in the Draft quality media:
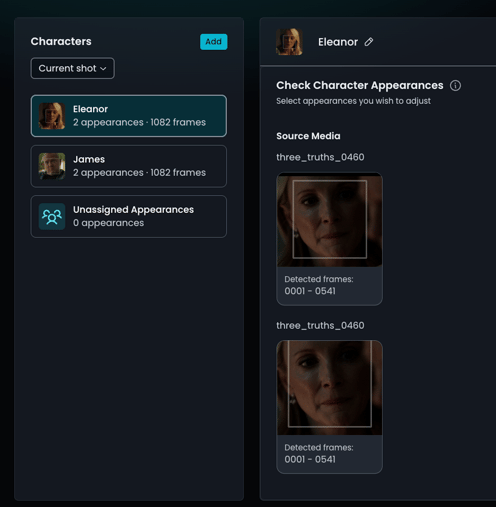
- If the character has not been correctly identified, make corrections as per ‘Reassigning an Appearance’ in Managing Characters.
Run Upgrade
NOTE: the vub upgrade will use the latest version of the Draft vub when lip sync refinement overrides are transferred to the Final quality vub. It is recommended that you open the refinement tool for the vub and check that the refinements present in the latest version are as desired.
- In the Vubs tab, select the vub you wish to upgrade to reveal the side panel for the vub on the right hand side:
- Select Create Upgraded version:
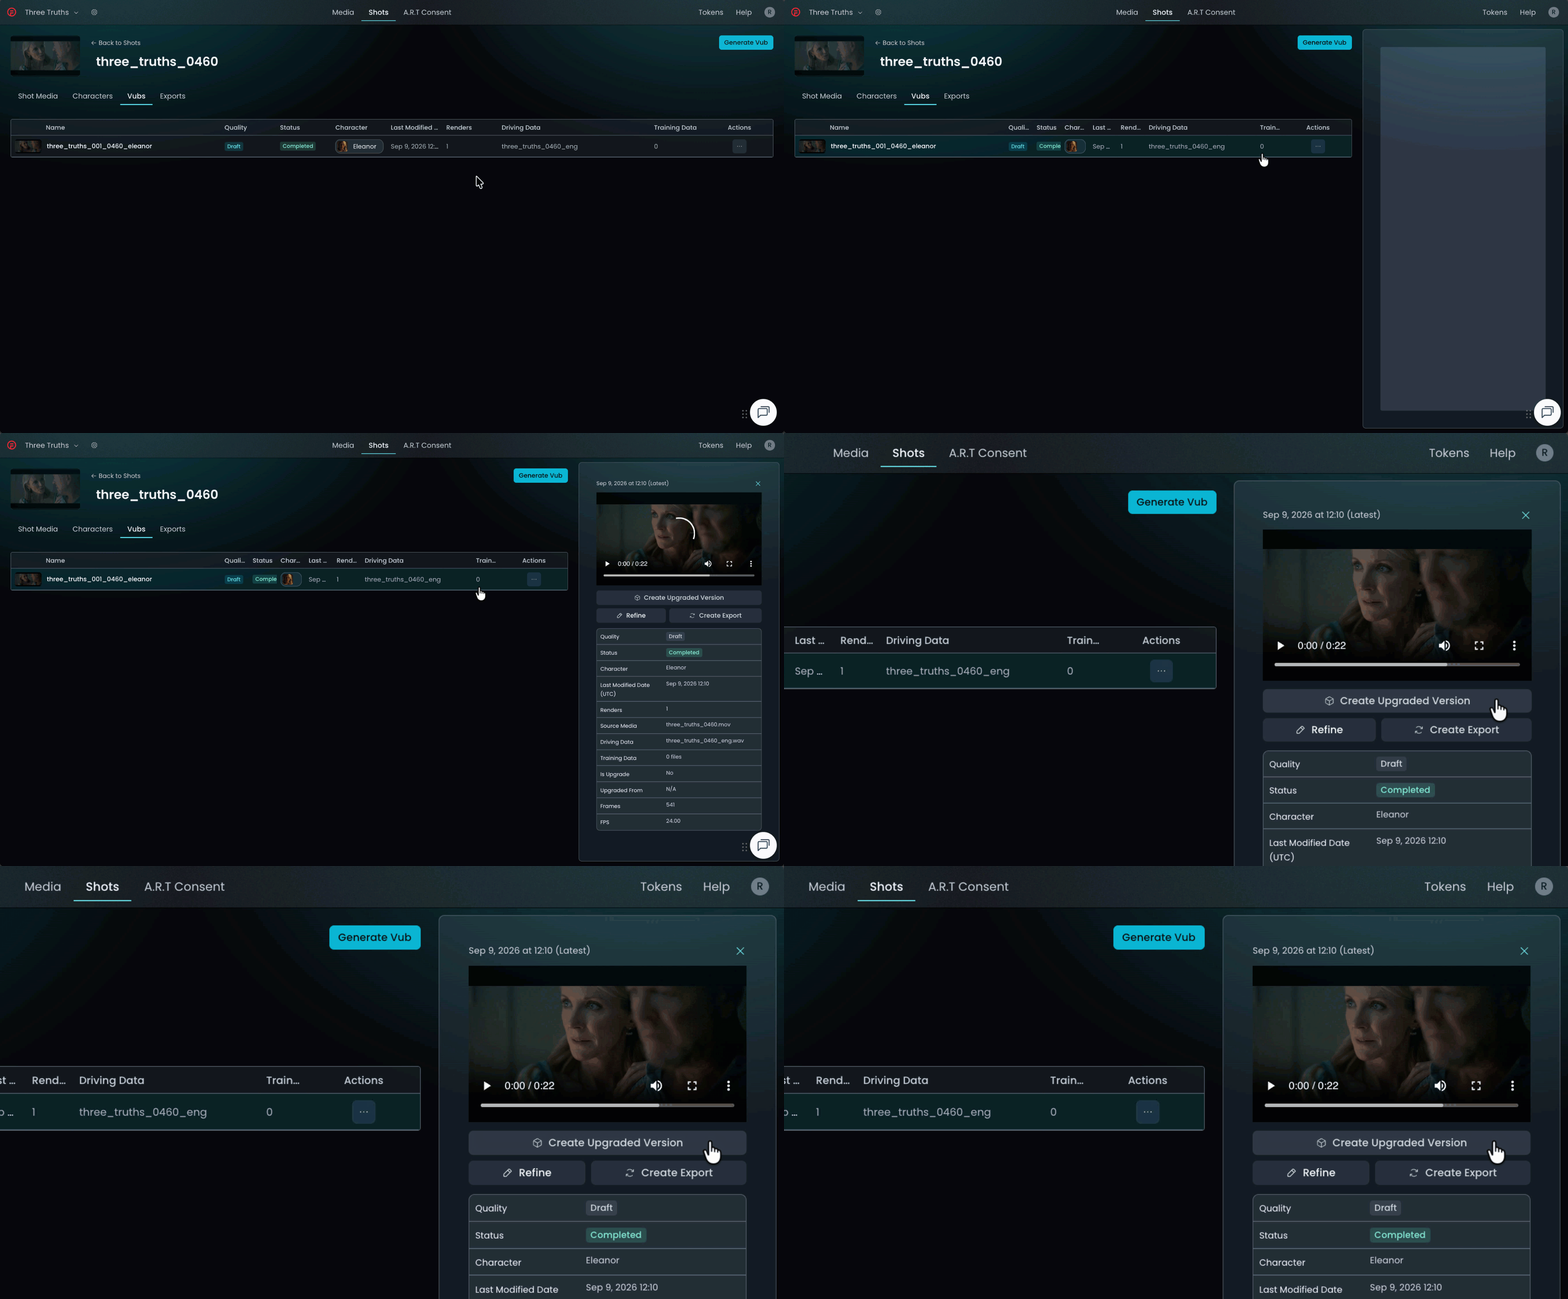
You will then be prompted to set the Vub Name of the upgraded vub and the Quality level that you wish to upgrade to (Final):
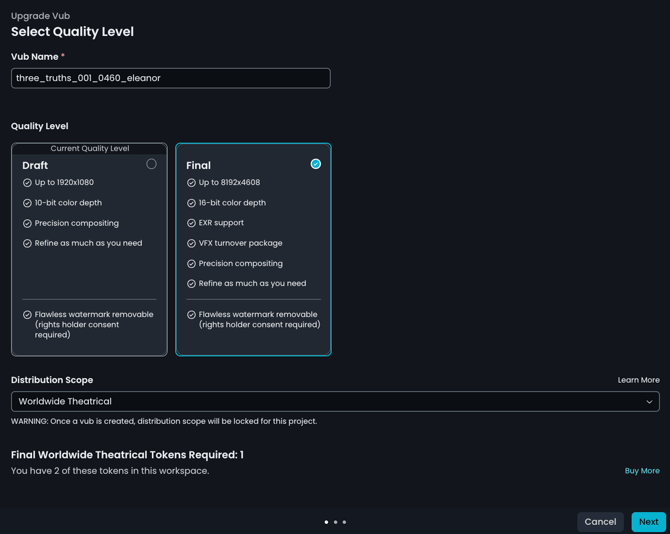
- Click Next to go the the next screen – Choose Data Files - where you can select the Source and Driving Data files you want to use.
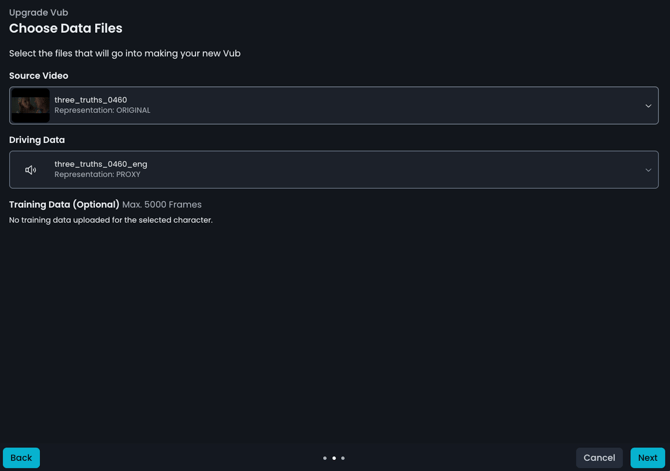
- Select your Final quality media as your Source video.
- Ensure that the Driving Data is correct, as used in the Draft vub.
- Select your Final quality Training Data media in the Training Data (Optional) section, if you are using any (deselect any proxy Training Data).
- When happy, hit Next to bring up the Confirm your Vub generation screen:
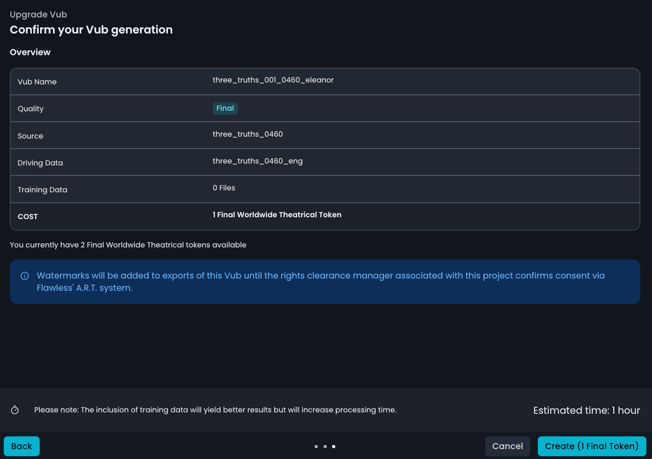
- Check the details of your vub upgrade and, if happy, select Create.
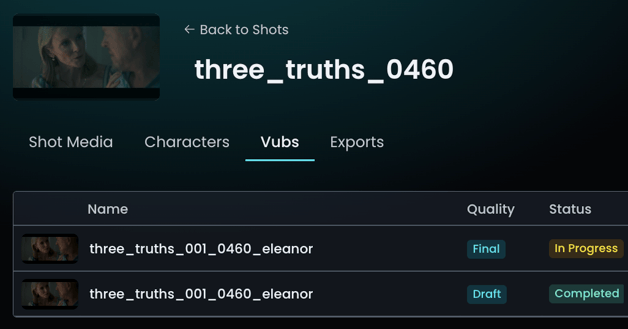
- The vub upgrade is now in progress, so the status of your Final quality vub in the Vubs tab will change to 'In Progress':
Check Lip Sync
When the vub is complete, check the lip sync of your Final quality vub. Any lip sync refinements made in the Draft vub will be transferred to the Final quality vub, but to be sure you are happy, review the vub in the Refinement tool. If you wish to adjust lip sync, refer to Lip Sync Refinement for guidance.
You may also want to send the MOV of your Final quality vub to Editorial for review – this MOV can be downloaded from the Exports tab.
Proceed to Export Your Final Quality Vub below.
Generating a New Final Quality Shot
If it’s been determined that you need to create a new shot for your Final quality vub, then you need to follow these steps:
Create Your Final Quality Vub
- Follow the guidance in Creating a Vub to create a Final quality vub. NOTE that if your Final quality media is an EXR image sequence, then that media should be uploaded using the guidance for uploading via Media Shuttle outlined in our Media Library article.
Refine Your Lip Sync
- When your Final quality vub has been generated, refer to Lip Sync Refinement for lip sync refinement guidance if needed.
Export Your Final Quality Vub
- When the initial Final quality vub was completed, two Exports will have been generated in the Exports tab – an EXR image sequence and a MOV.

- If any further lip sync refinement has taken place to the Final quality vub, you should have generated new MOV & EXR Exports.
- You can download each of these Exports using their Download buttons – note that the EXR image sequence is downloaded via MediaShuttle.
Merge Multiple Exports
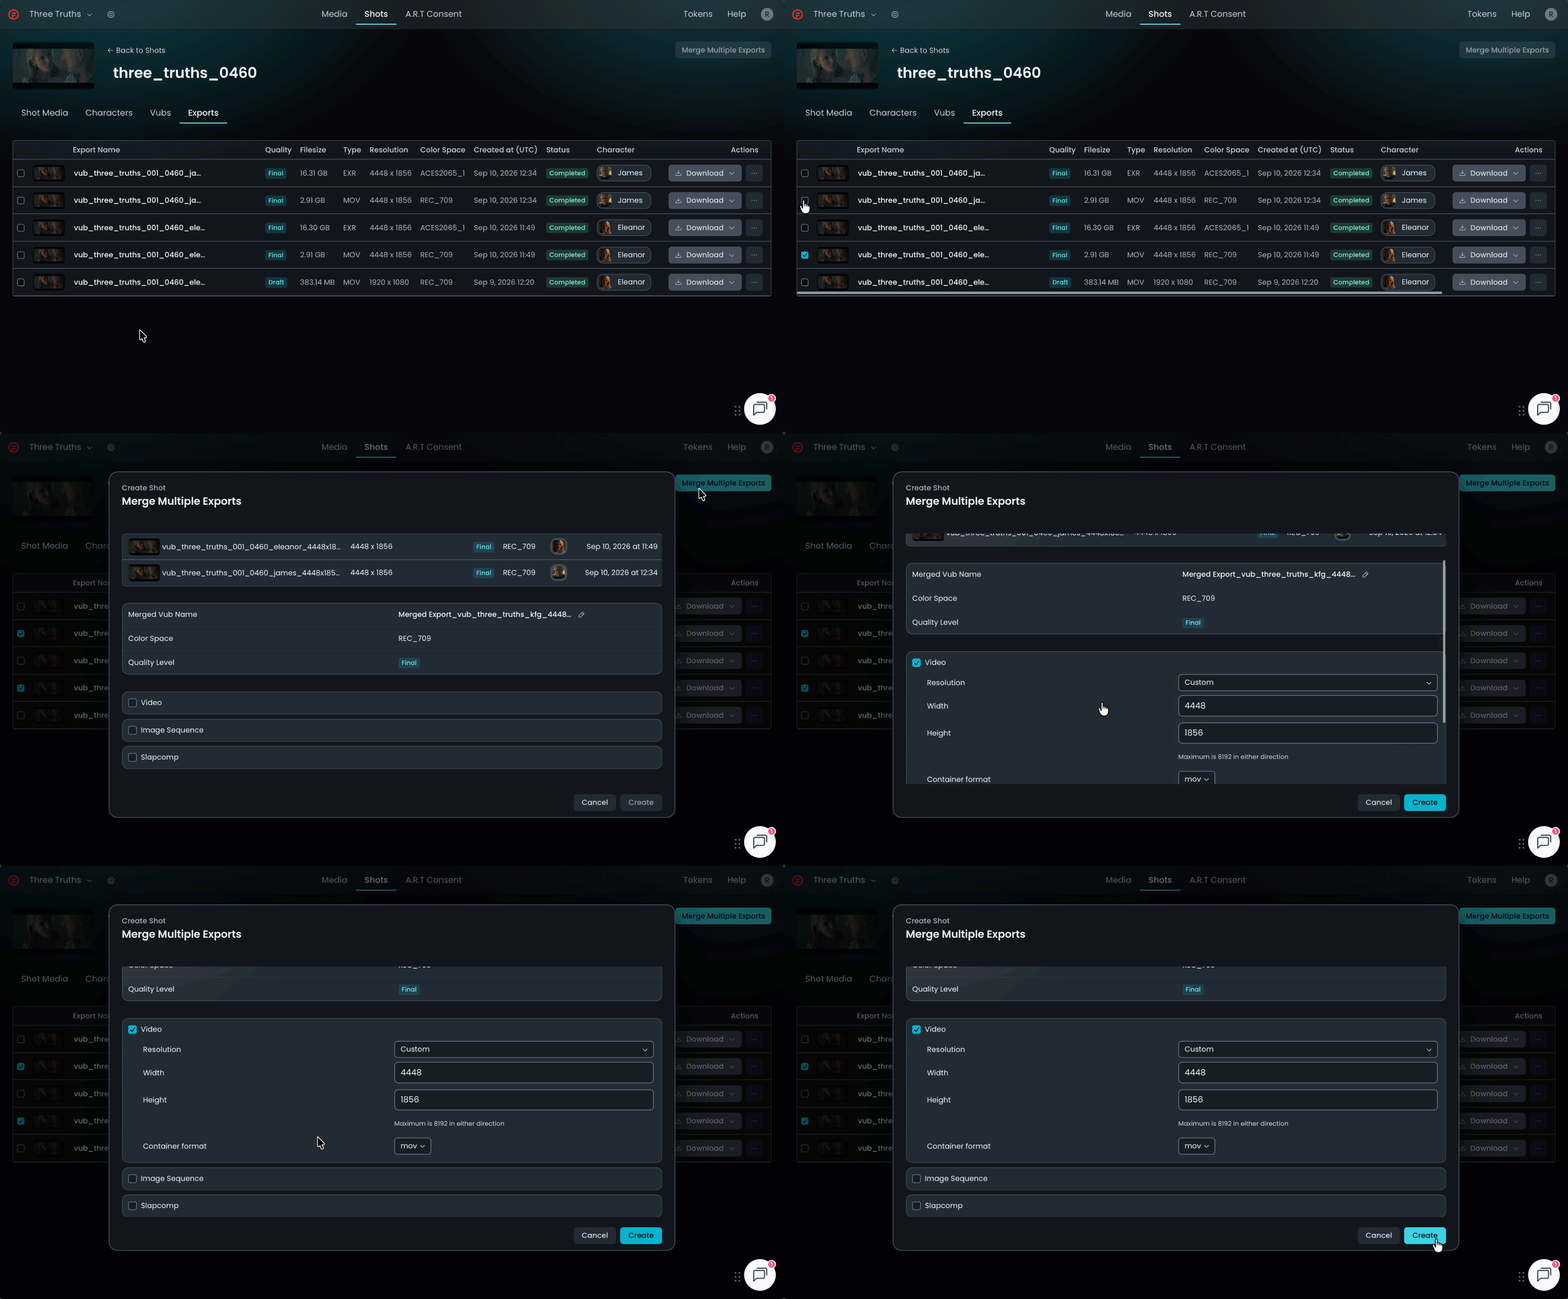
If your shot had more than one character being vubbed, you will want to merge their separate vub Exports into a single Export. To do this, select the Exports you wish to merge (either the MOVs or the EXRs) and select Merge multiple exports. Detailed guidance on this process is available in our article Exporting a Shot with Multiple Vubbed Characters.
Now proceed to Final Quality Finishing.
Refer to Final Quality Vubbing Workflow for an overview of each step in the Final Quality Vubbing process and who should complete each step.