Note: To create a vub using the Flawless Avid Extension, follow the instructions here.
Checklist
Before creating a vub, ensure you have done the following:
- Uploaded your Source media, Driving Data and, if applicable, Training Data to the Media Library.
- Created a shot using your Source media and added the Driving Data and, if applicable, the Training Data to that shot.
- Checked the Character detection is correct for your shot.
If all the above is done, you are ready to create your vub.
Vub step-by-step
-
Click on the Generate Vub button.
-
Enter the Vub Name and select the desired vub Quality level. If you're creating a Final quality vub, make sure you select the correct distribution scope - see DeepEditor Token Types & Distribution-Based Pricing:

-
Select the character you want to vub:
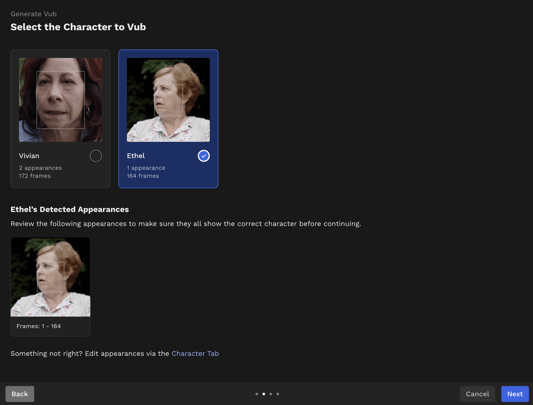
Note: You can only vub one character at a time. If there is more than one character you'd like to vub in the same shot, you need to create separate vubs for each character (each vub will use 1 token). Once you have the exports ready for each character, you can use the Face Merge feature to combine them into one export.
-
Select the Source media, Driving Data, and (if applicable) Training Data.
-
Click Next to check all details, then click Create to start the vub creation. You do not need to remain in the web app once the vub is kicked off.
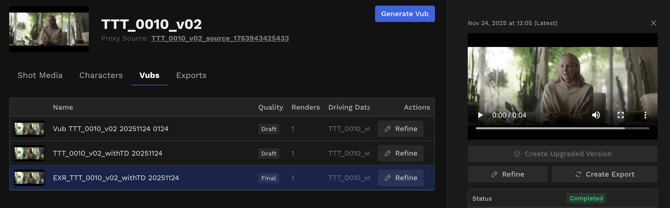
Vub completion
In the Vubs tab, your newly created vub will be displayed with the status 'In Progress'.
When your vub is ready, the status will switch to Completed and you will get an e-mail notification:

Note: A typical shot of 5 seconds duration will be ready in approximately 1 hour. This time may vary according to shot duration, presence of Training Data, or shot complexity.
If you feel your vub is taking excessively long to be created, please contact us at support@flawless.app.
Vub review
Once your vub is complete, there are three ways that you can review it:
- watch in the preview player
- watch in the Refinement tool
- export and watch using software outside of DeepEditor
Here we will look at using the preview player - see the links above for reviewing via the Refinement tool or by exporting.
Preview player
To view in the preview player, click on a vub and a panel will open on the right side of your screen that (a) shows more information about your vub and (b) contains the preview player. This shows the latest render of the vub and can be expanded to full screen.
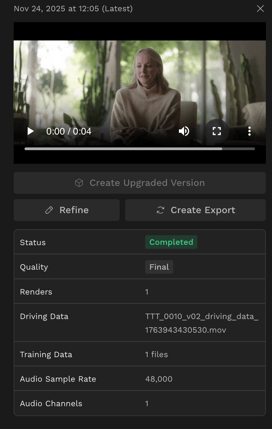
Note: What you see in the preview player (and in the Refinement tool) is not the full-quality resolution of your export, but a version optimized for web playback.