-
Audio Scrubbing
-
Use Headphones
-
Light Moves Faster Than Sound
-
Zoom in to Get the Best Look
-
Work to the Sound at the END of the Frame
-
Placement of Keyframes
-
Less is More!
Audio Scrubbing
- Go to the areas that didn’t quite feel right in your vub and examine them in detail using the left/right arrow keys to audio scrub through the frames.
- Listen carefully to what sounds are being made on each frame, and check that the lip shapes and timings are correct, as per the guidelines in Refinement Step 4: Mouth Shape Pass.
Use Headphones
- When you’re refining, you’re interested in the details and subtleties of per-frame audio. Working with headphones on will allow you to hear these details.
Light Moves Faster Than Sound
- In the real world, you always see things fractionally before you hear them – never the other way round. So, if the timing of a mouth shape action is possibly late compared to the audio, play it safe and adjust it to happen fractionally early.
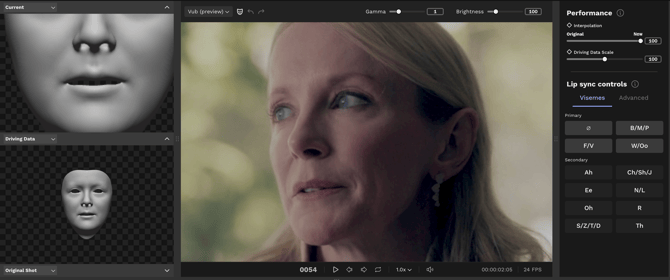
Zoom in to Get the Best Look
- In the main window, zoom in on the character’s face to make assessment as easy as possible.
Work to the Sound at the END of the Frame

- If you listen to the audio on a single frame (using audio scrubbing), you may find you can hear more than one sound in that frame. We are interested in the sound at the end of the frame of audio, such that we never hear a sound before we see the physical action. For example:
-
- If you hear ‘EM’, or just ‘M’, then you want an ‘M’ mouth shape.
- If you hear ‘MA’, the mouth shape should be releasing from the ‘M’ on this frame and moving into the ‘Ah’ shape.
Placement of Keyframes
- When applying overrides to refine a mouth shape, it is important to place your keyframes such that they don’t cause additional unwanted movements.
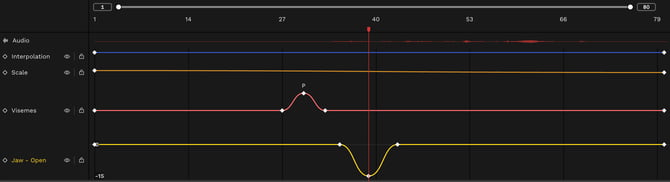
- For each override, you will typically apply three keyframes:
- Start (anchor) Keyframe – where the adjustment will start taking effect.
- Centre Keyframe – where the peak of the adjustment takes place.
- End (anchor) Keyframe – where the adjustment will finish.
- The most common refinement that takes place is to enhance articulation that already exists in the Driving Data: it is therefore important that:
- The start and the end keyframes correspond to the start and the end of the movement that already exists in the vub;
- The centre keyframe(s) (the peak of the override) correspond(s) to the peak of the movement that already exists in the vub.
- This is most easily understood by thinking about an Ah viseme override. If you want to make an existing 'Ah' mouth shape bigger, then:
- Place your Ah override on the peak of the mouth opening that already exists. The start and end anchor keyframes will be automatically placed 3 frames either side of this.
- Adjust your start anchor keyframe left/right to be where the existing jaw movement starts;
- Adjust your end anchor keyframe left/right to be where the existing jaw movement finishes.
- Where possible, avoid short, sharp overrides. These are at risk of creating unnatural, inorganic movement.
Less Is More
- You should never need to add a large number of keyframes - the majority of the final vub should be derived automatically by DeepEditor. Too many overrides can introduce an inorganic feel.
Download the Refinement Best Practice guide for reference.
Read next: Refinement: Keyboard Shortcuts