A.R.T. for Requesters
Obtaining consent from performers to make substantial changes to their performances is necessary in certain circumstances. Here's the process to follow.
Table of Contents
Who is the Requester?
Set Up a Project for Consent
Assign a Rights Clearance Manager (RCM)
Invite Additional RCMs
Generate and Track a Consent Request
Consent Request Stages
Download Without Watermark
Handle Declines or Use Overrides
Who is the Requester?
The requester is the end user, who is making or initiating the request for consent at the vub level.
Set Up a Project for Consent
When you create a new project in DeepEditor:
In the Create Project pop-up, select one of the following:- Localization
- No consent review is required to download.
-
If your project includes a legal "Dubbing Agreement" or comprehensive consent from the talent (or an authorized representative of their estate or interests) for facial modifications, select the "Localization" Project Type.
- No consent review is required to download.
- Editing:
- Consent review is required to download vub exports
- RCMs can change these requirements

➡️ This guide assumes you’re working on an Editing project.
Assign a Rights Clearance Manager (RCM)
After selecting the 'Editing' project type, use the dropdown to choose a Rights Clearance Manager.
-
- This person is responsible for managing consent settings and requests.
- It’s usually your Production Coordinator or Post Producer.

You have two options:
- Nominate yourself - If you're creating the project and plan to manage consent, you can take on this role immediately.
- Nominate someone else - Choose any DeepEditor user in your tenant.
- If you need to assign someone outside your organization, contact Customer Support to have them added to DeepEditor and to your tenant.
Once a nomination is sent:
- The Rights Clearance Manager invitee(s) will receive an email and can accept or decline.
- You’ll be notified and see their decision in Project > Settings > Roles.
- A Rights Clearance Manager can not perform any actions without first accepting the role invitation.
Invite Additional RCMs
At any time, you can add more Rights Clearance Managers:
Go to Project > Settings > Roles.
![]()
Click Add Role.

Generate and Track a Consent Request
Once your vub export is ready:
- Find the export in the Project > Shot > Export tab.
- Check the Consent column:
- If it says Not Required or Approved, you can download the export without a watermark immediately.


- If it says Request Not Sent, clearance review is required.
- If it says Not Required or Approved, you can download the export without a watermark immediately.
To request clearance:
- Click the Download dropdown in Export Actions and choose Download No Watermark.

- Add any notes (optional) and click Submit.

- The status updates to Awaiting Review, and all RCMs are notified by email.

You can track the progress of your request in Project > A.R.T Consent:
- View pending and past consent requests.

- Click any row to see a detailed timeline of actions and decisions.

Consent Request Stages
A consent request may go through the following stages:
- Auto-Approval - Based on the project’s consent settings
- Clearance Review - Reviewed by a Rights Clearance Manager
- Rights Holder Review - Referred to the rights holder for approval
You will be notified by email once your request is approved or declined.
Download Without Watermark
Once your consent request is approved:
- You will receive an email notifying you of approval.
- Return to Project > Shot > Export.
- Download the export without a watermark.
Handle Declines or Use Overrides
If your request is declined:
- You will receive an email notifying you of the decline.
- The Consent column will show Rejected.
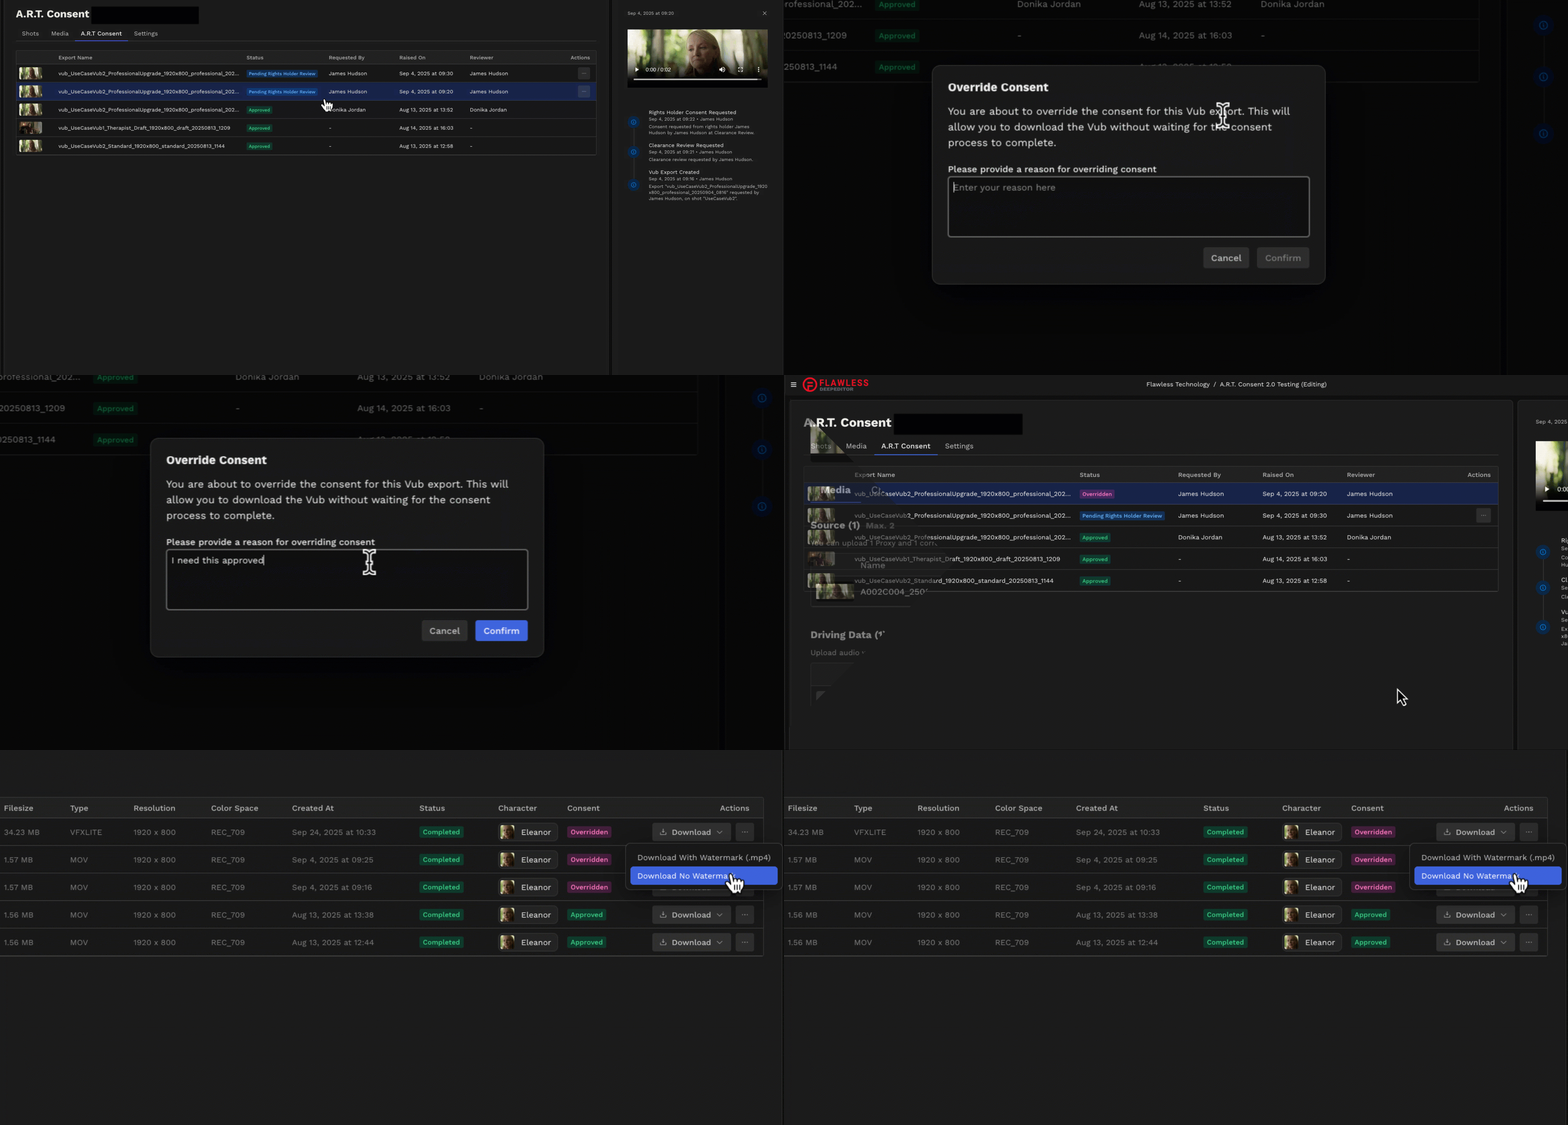
In case you need to bypass consent, you can override a consent review:
- Go to Project > A.R.T Consent.
- Click the ... menu next to the request.
- Select Override to enable immediate download without approval. You will then find your file available to download on the Exports page.
- The override will be tracked in the A.R.T ledger on the A.R.T Consent page.

Want to learn more? Read How to Download a Vub.
