What is Source media?
Source media is a cut-to-cut shot of an actor’s original performance that you want to modify.
With DeepEditor, you are changing the actor’s original performance and dialogue in the Source media to deliver a new performance and dialogue while keeping the rest of the shot intact.
The source file should be exported to match the frame rate, resolution, color space, and codec of the non-linear editor project where it will be viewed.
What makes good Source media?
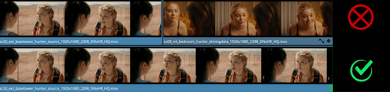
- Keep it to a single, continuous clip. Source media should be a single cut-to-cut shot with no black frames, up to 1440 frames (60 seconds @ 24fps) duration.
- The face being vubbed should be human… or humanoid. DeepEditor is built to vub human faces, so if you would like to vub non-humans, the boundaries of success are dependent on the non-human appearance: the more humanoid, the greater the chance of success.
- Ensure the actor's face is sufficiently visible in the frames that require vubbing. The face should:
- Be reasonably in view, with the jaw and at least one eye visible
- Be sufficiently lit such that facial features are identifiable
- Not have any obstructions to the face that are completely blocking or distorting key facial features (eyes, nose, mouth)
- Not have a long beard; at the time of writing, please contact support@flawless.app if a character with a long beard requires vubbing as support for this is on our product roadmap.
- Have non-extreme head rotation:
- Looking left-right (Y-axis rotation): no greater than 100 degrees
- Looking up-down (X-axis rotation): maintain visibility of eyes and mouth
- Screen orientation (Z-axis rotation, e.g. lying down or upside down): max rotation of 45 degrees; beyond that, apply rotation to your Source media prior to upload to make the character’s face more vertically oriented.
How Do I Create Source Media?
You would create your Source media typically using one of two methods:
- for Draft quality vubbing
- by exporting clips from your offline editing software e.g. Premiere Pro.
- if using Avid Media Composer, using the DeepEditor Avid Extension - read the guidance here.
- for Final quality vubbing
- by extracting the exact frames you need from your camera original media. This will typically performed by a facility holding the camera original media, or - if you you have access to the camera original media - by using sofware such as DaVinci Resolve.
Before exporting and uploading your Source media, check that your media meets the file format and codec requirements for DeepEditor.
Read next: Driving Data