This guide is split into two parts to help you get started quickly.
The Setup Guide and Installation section shows you how to install and open the Flawless DeepEditor plugin in Avid Media Composer.
Then, in Step-by-Step: Generating Your First vub, you’ll learn how to create a project and produce your first visual dub directly from your Avid timeline.
Setup Guide and Installation
System Requirements
Mac:
- macOS Sequoia 15 or later
- M1 series CPU or later
- Intel CPU for Apple hardware under active support
Windows:
- Windows 11 (24H2) or later
- x86 CPU supported only
Avid Media Composer Software:
Avid Media Composer® 2024.10 or later
Download and Install the DeepEditor Plugin
Sign up here to gain access to the installer.
Mac users:
To install the plugin, download and open the .zip file you received via email.
Open up the .pkg file to begin installation. Follow the steps in the installer to complete the process.

Windows users:
With the downloaded .zip, 'Extract All' and then run the installer
Restart your machine after completing the installation process.
Currently the plugin is not ready for Linux.
Accessing Flawless DeepEditor in Avid
Once the plugin is installed you will be able to access DeepEditor in Avid.
- Enter your Avid project
- Go to Tools (in the top list of menus)
- Select Flawless DeepEditor (towards the bottom)
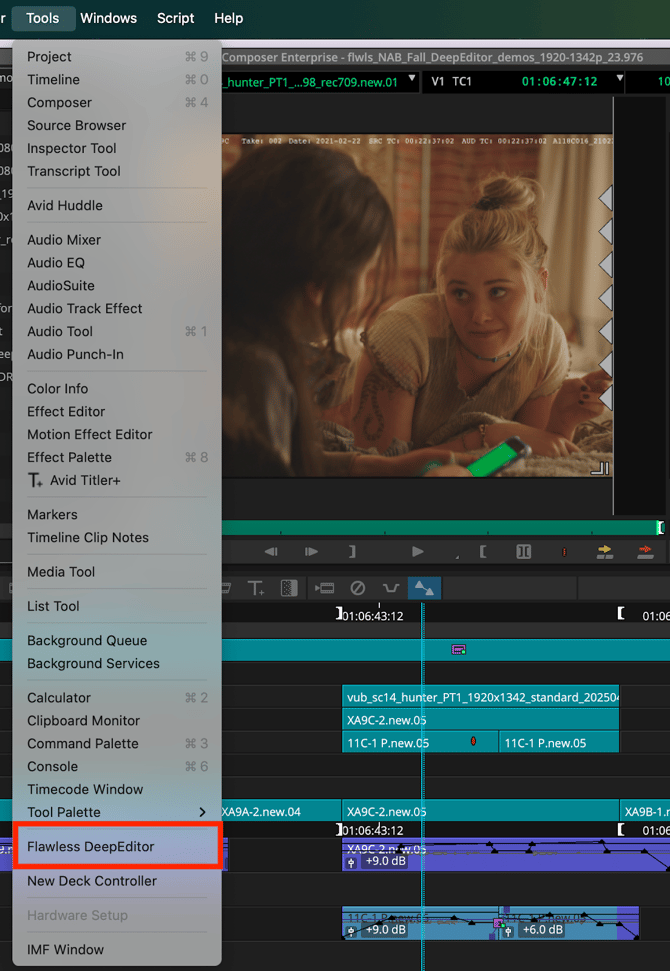
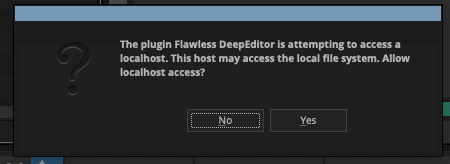
4. Allow localhost access.
Allow Localhost Access
DeepEditor needs permission to talk to a helper app running on your computer, it’s just how the plugin works behind the scenes to ensure files are uploaded to DeepEditor securely.
Log In
If you have never logged into the DeepEditor through the webapp, check out this article on Setting Up an Account and Signing In.
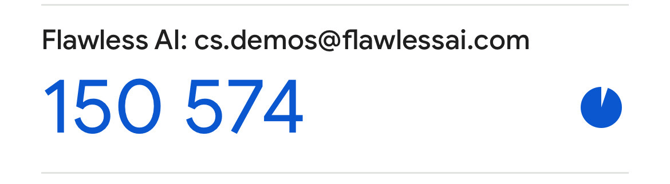
Just like the webapp, you will be prompted to log in and then enter your two-factor authentication code.
Your one-time code will be accessible through the application you chose when setting up your DeepEditor account for the first time.
Below is an example from Google Authenticator's interface.
Step by Step: Generating Your First Vub
Project Creation
If you are logging into DeepEditor for the first time you will need to create a project. Feel free to name it whatever you want, but we recommend giving your DeepEditor project the same name as your Avid project.

Here is some more detail for the 'Use DeepEditor consent management (uncheck if consent is handled via existing contracts)' checkbox
DeepEditor includes built-in consent management powered by our Artistic Rights Treasury (A.R.T.) platform. A.R.T. is designed for the film and TV industry to ensure that any substantial changes made to a performer’s image are properly tracked, authorized, and compliant with union rules and contractual obligations.
By keeping the box checked, DeepEditor will handle the process of securing and recording performer consents directly within the tool, providing assurance to producers, provenance of data, and enabling safe commercial usage as well as related compensation and accreditation flows. If your production already manages performer consent through existing contracts or external systems, you can uncheck this box and continue to handle consent outside of DeepEditor.
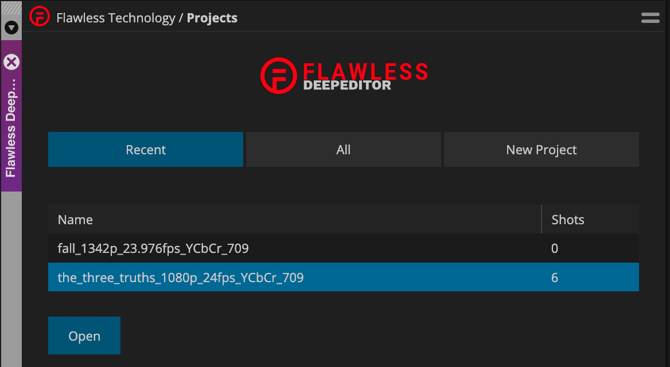
If you’ve already created a project via the DeepEditor web app, you’ll see your existing projects listed, from there select the one you want to work with.
Source and Driving Data
Before creating your first vub it's important to understand the two assets that need to be created in DeepEditors' visual dubbing workflow, details can be found in the How To Prepare Your Media for a Vub article, but here is a quick summary
- Source Media - your original shot containing the original performance from the actor, this will be a single shot with the actor's face clearly in frame.
- Driving Data - the new performance you want to apply to your source.
The timing of the driving data in relation to the source needs to be decided by the editor. There will need to be consideration for the physicality of the actors performance in the source file and how it times with the new speech in the driving data.
Once your project has been created and you have an understanding of source and driving data, you can follow this step by step guide to generate your first vub.
Step 1: New Shot
Open your project, and you will automatically be taken to the create shot page.

What’s the Difference Between a Shot and a Vub?
A Shot is the foundation for a vub. It contains:
- Source Media – the original performance (your existing shot)
- Driving Data – a new performance that you want to apply to the source
Think of a Shot like a container, you're pairing the old performance with the new one, getting them ready to be enabled with DeepEditor.
You’re saying:
“Here’s the original performance, and here’s what I want to change it to.”
A Vub (visual dub) is the file created at the end of this process, the actors mouth movements will be adjusted to be in sync and match the performance of the new dialogue.
Step 2A: Source and Driving Data Creation - Import From Timeline
The quickest way to get started is to pull media straight from your Avid timeline with the Load From Timeline button
In this version of the workflow you can utilize in/out points and track selection to create your assets.
- In your timeline set In/Out points to determine the duration of the media you want to export, use track selection to isolate the media you want for your source or driving data.
- In the DeepEditor plugin choose
- A Shot Bin, choose a bin to link the exported .mov back into your Avid project.
- A Tmp Media Destination this will be a file path for the .mov files DeepEditor will create during the Import from Timeline process.
On macOS the default file path for the Tmp Media Destination is:
/Users/Shared/AvidMediaComposer/Avid MediaFiles/Flawless
You are able to input a custom file directory if you prefer. If you do enter a custom file directory you are able to 'Set as default', this will allow your custom file directory to persist across the shots you create.
When specifying a custom file directory, make sure the folder already exists and that you have write permissions.
- On your timeline select the relevant track(s) that contain the video/audio for either source or driving data.
- Please note for driving data it is possible to only have an audio track selected.
- Click 'Load from Timeline' at which point the plugin will:
- Export the marked in/out as a .mov file that follows your project's resolution, frame rate and color space.
- The default codec used in the current version of the plugin is DNxHR SQ
- Link the .mov into your chosen bin.
- Auto-populate the correct drag/drop section (source or driving data) in the plugin UI.
- Export the marked in/out as a .mov file that follows your project's resolution, frame rate and color space.
Step 2B: Source and Driving Data Creation - Drag In From Bin
The Drag In From Bin method of the workflow is designed for when your source and driving data assets are already exported to a directory and linked into a bin.
You can review the linked files in Avid and then Drag/Drop them into the relevant box, at which point they will automatically upload.
For either the Import From Timeline or Drag In From bin method, once the shot is fully set up (both source and driving data uploaded), you can Create Shot & Prepare media for Vub.
You’re telling DeepEditor:
“Now that I’ve lined up both source and driving data and created the files, go ahead and upload them so I can start generating the vub.”
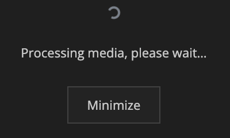
At which point the assets will upload to DeepEditor. When the upload is complete the video files will be processed to detect all the characters.
Step 3: Choose Character and Create Vub
Once your source and driving data are uploaded, you’ll be prompted to select two options before creating your vub:
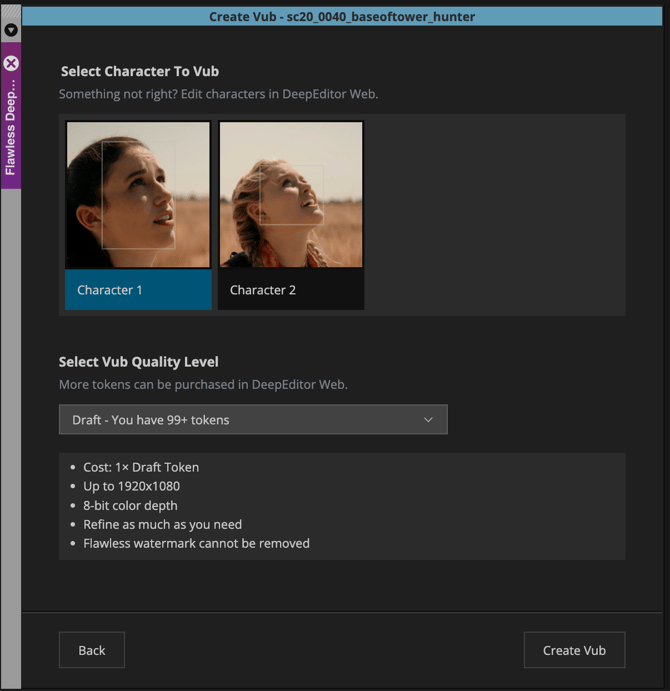
Select Character to Vub
DeepEditor automatically detects all characters present in your uploaded shot.
At this step, you must select a single character you want to vub.
- You’ll see all detected faces labeled (e.g. Character 1, Character 2).
- Only one character can be selected per vub.
Want to vub multiple characters in the same scene?
Create a separate vub for each character using the same shot setup.
Character Selection is still evolving, currently all characters detected in the shot will be displayed as 'Character 1', 'Character 2', 'Character 3' etc... updates to this workflow will be released soon.
Select Vub Quality Level
This determines the resolution, bit-depth, processing time, and overall fidelity of the vub you generate.
- Draft Vub (Recommended for first-pass testing)
Ideal for quickly testing a visual dub idea. Draft vubs are faster to generate and lower in resolution, perfect for creative experimentation. - Higher Quality Tiers (Optional)
If you’re ready to view the vub without a watermark and evaluate in more detail you can choose a tier above Draft.
Note: DeepEditor cannot upscale resolution or bit-depth. Your vub’s maximum quality will match the source media you provide, it will never exceed it.
Suggested Workflow: Start with a Draft vub to validate the idea, then render without a watermark and at higher quality if needed.
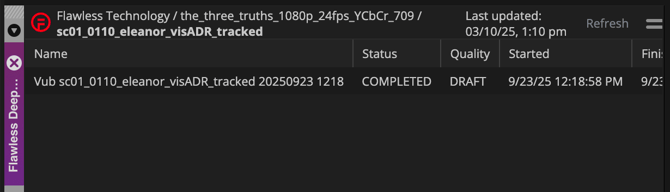
With the two selections made you can then click 'Create Vub'
You will be returned to the Vub list page where you can monitor progress and view its associated metadata.
Step 4: Importing Your Vub Export via 'Add to bin'
When your vub is ready, you'll receive an email notification.
- In the plugin, double-click your vub to open the Exports page.
- Right-click on the export and choose a bin to import it into.
Alternatively:
- Click, hold, and drag the vub export directly into an open bin.
The imported file will follow your Avid Import Settings:
Preferences > User > Import
You can now add the vub to your timeline and view the vub in the wider context of your narrative.
If you want to refine it further, use training data, or export at a higher quality, head over to the DeepEditor web app.
Support
If you experience any issues, please contact us at support@flawless.app
Requesting Consent via the Artistic Rights Treasury (A.R.T.)
The Flawless DeepEditor Avid plugin now includes built-in consent management powered by the Artistic Rights Treasury (A.R.T.). This ensures that any vub exports requiring performer consent are properly reviewed and approved before release.
When you highlight a vub export in the plugin, you’ll see two options:
Add to Bin and Request Consent.
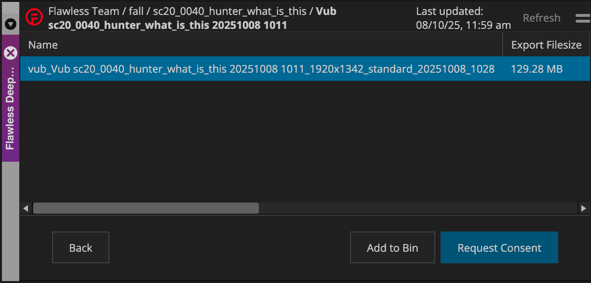
If your selected vub’s quality tier requires consent management via A.R.T. and you want to access a non-watermarked version of the export, click Request Consent.
This will open a consent request page: Clearance Review Required
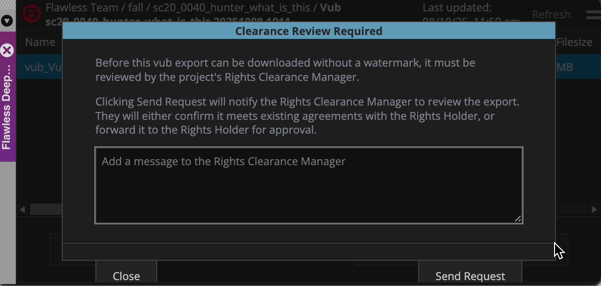
On this page, you can optionally include a message to the Rights Clearance Manager. While not required, adding a short note can help provide useful context about your vub for example, what changes were made or which scene it applies to so reviewers have the full picture when assessing the request.
Once you click Send Request, your vub export (along with your message, if added) will be submitted to the A.R.T. platform for review.
You’ll receive an email notification once the consent request has been approved or denied:
-
Approved: You can import the non-watermarked vub into your Avid bin.
-
Pending or Denied: You can still add a watermarked version of the vub to your bin while waiting for or resolving consent approval.
A.R.T. handles the clearance workflow, ensuring that all performer image rights are properly reviewed and recorded before commercial use.