


-
Overview
-
Explainer video
-
System Requirements
-
Download and Install the Extension
-
Accessing Flawless DeepEditor in Avid
-
Air-Gapped Avids
-
Uninstall the Extension
-
Next Steps
Overview
To install the DeepEditor Avid extension, download via the appropriate button above and run the installer. The installer will establish a secure web relay between Avid and DeepEditor’s online services. This ensures your workstation can upload and download media without interruption.
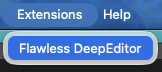
Once installed, you will see Flawless DeepEditor available directly from the Extensions menu (or the Tools menu for versions of Avid between 2024.10 & 2025.11).
It is recommended that you close Avid Media Composer before undertaking the steps in this guide.
Explainer video
Learn how to install, configure temp media settings and create your first project using the DeepEditor Avid Extension in this short video (1 min 47 sec).
System Requirements
Mac
- macOS Sequoia 15 or later
- M1 series CPU or later
- Intel CPU for Apple hardware under active support
Windows
- Windows 11 (24H2) or later
- x86 CPU supported only
Avid Media Composer Software
- Avid Media Composer® 2024.10 or later
Download and Install the Extension
Mac users
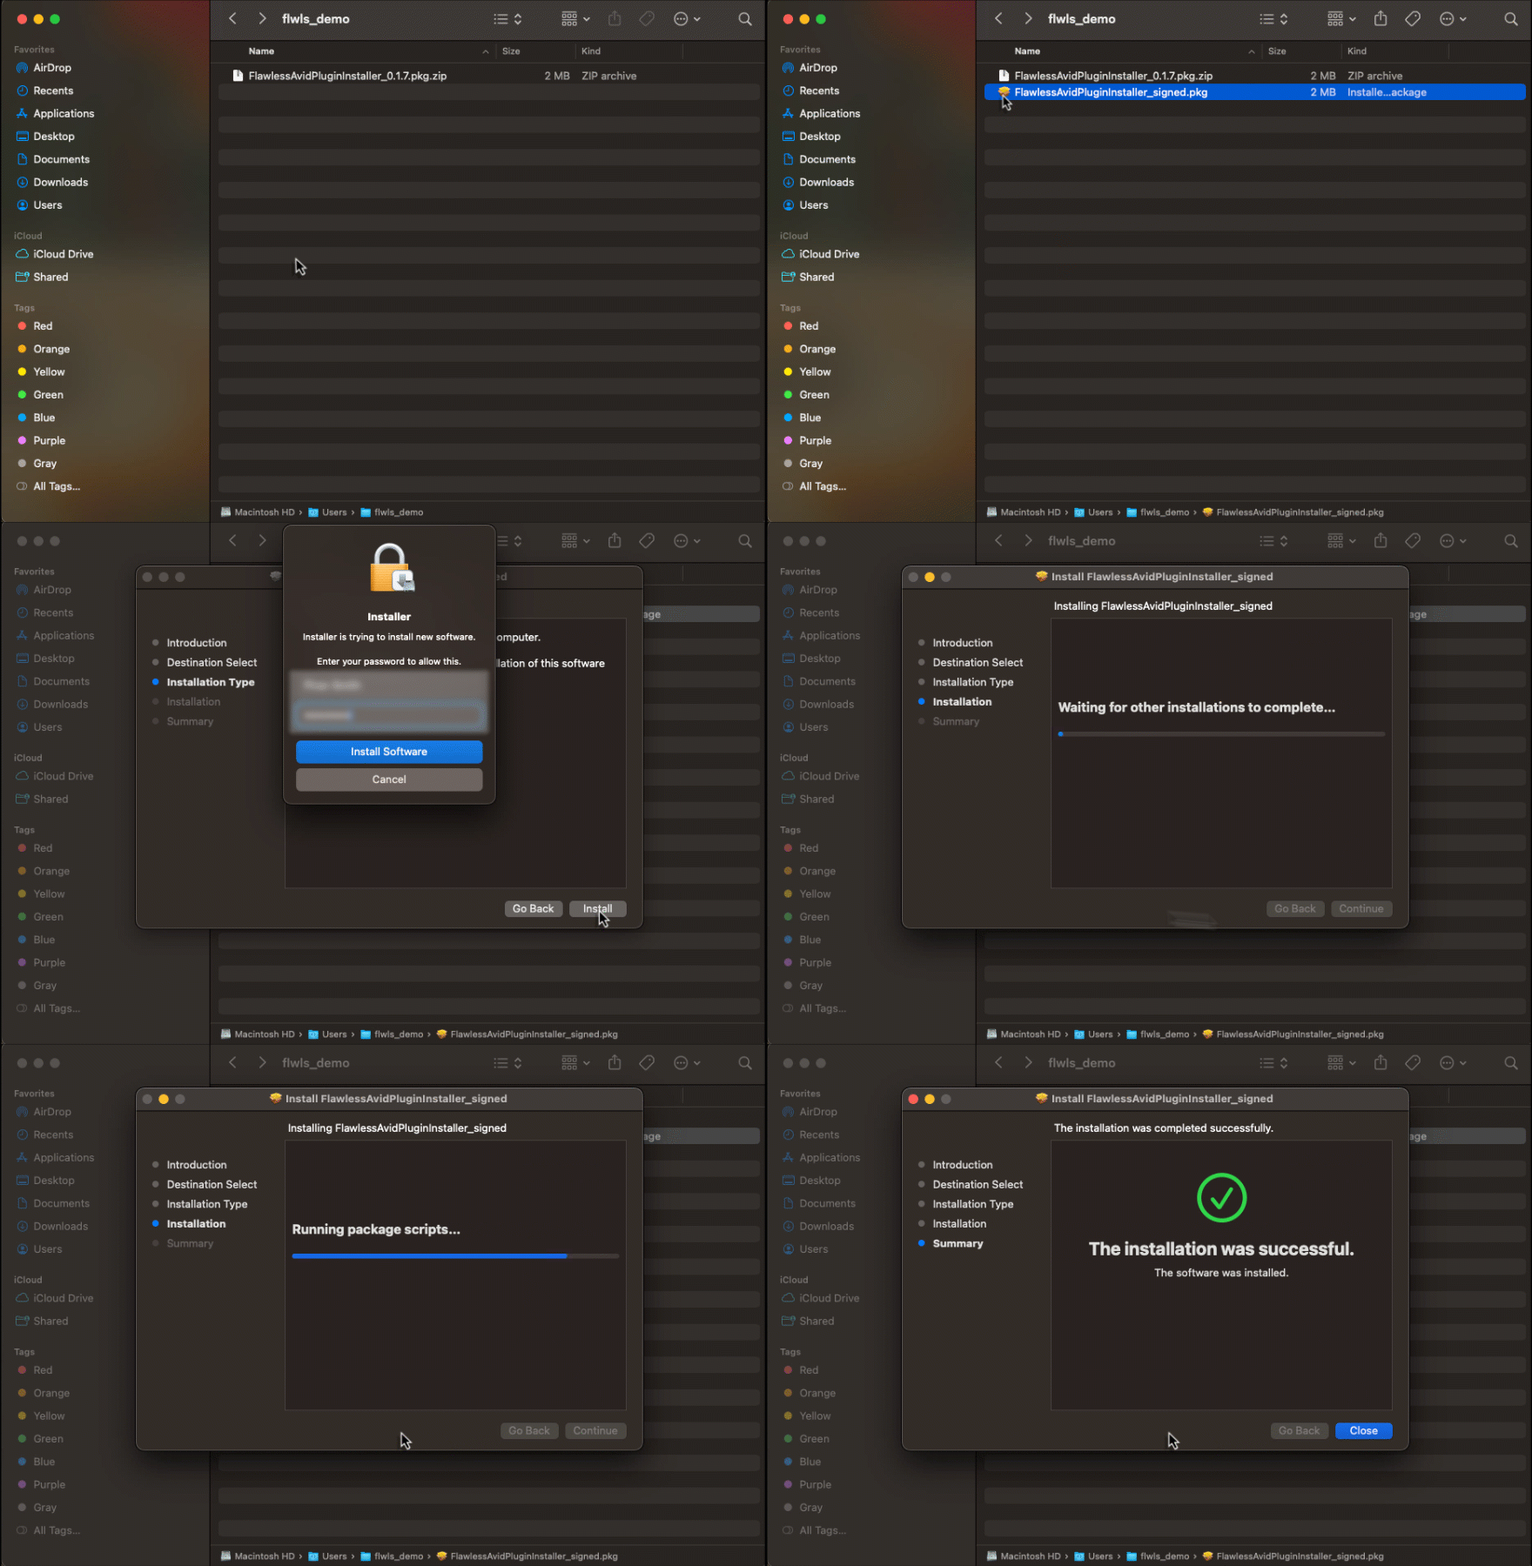
- From the Avid Extension installation page, click Download for Mac. This downloads a .zip file.
- Double-click the .zip to open it, then double-click the .pkg file inside to launch the installer.
- Follow the installer: click Continue, choose an install location (or leave the default), then click Install.
- Enter your Mac login password (the one you use to unlock your computer, not your DeepEditor account) to authorize the install.
- Once the installer finishes, you can move the .pkg file to the Trash, this is optional, not required for the extension to work.
- Open Avid Media Composer and go to Extensions › Flawless DeepEditor.
Windows users
On Windows 11:
- Click Download for Windows, then double-click the downloaded .zip file and open Flawless_DeepEditor_Avid_WinX64_2.2.0 to run the installer.
- If Windows shows a SmartScreen warning ("Windows protected your PC"), click More info, then Run anyway.
- Choose an install location and click Next, then click Install.
- Once the wizard completes, click 'Finish', you'll be asked whether to restart now or later.
- Open Avid Media Composer and go to Extensions › Flawless DeepEditor.

Restart your Avid Media Composer after completing the installation process.
Currently the DeepEditor Extension is not available for Linux.
Accessing Flawless DeepEditor in Avid
Once installed:
- Enter your Avid project
- Go to Extensions (Tools for versions of Avid between 2024.10 & 2025.11)
- Select Flawless DeepEditor
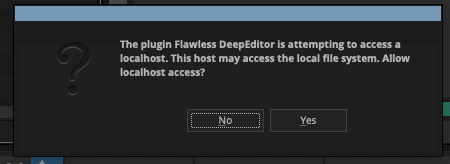
- Allow localhost access.
Allow Localhost Access
DeepEditor needs permission to talk to a helper app running on your computer; this is a background process to ensure files are uploaded to DeepEditor securely.
Air-Gapped Avids
If, for data security reasons, your Avid(s) is air-gapped and you are using a VPN Air Bridge for selected connectivity, then the details of connectivity requirements for your Air Bridge whitelist can be found here.
To confirm that your connectivity whitelisting has been successful, use this connectivity tester to run a test for all required connections.
Next Steps
You’re now ready to start working with the Flawless DeepEditor extension inside Avid Media Composer.
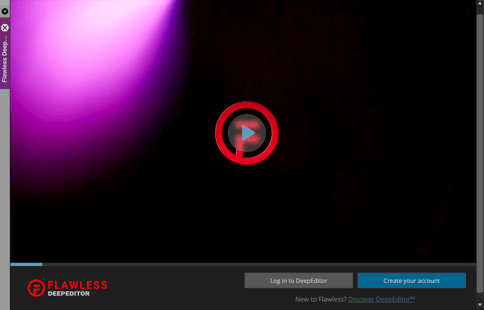
If you don't already have a DeepEditor account, open the Extension, select Create your account and follow the steps for sign-up. If you do already have a DeepEditor account, select Log in to DeepEditor and enter your credentials.
Once logged in:
-
To explore the workflow, follow our guide Avid Extension: Creating your vub
-
If you’re setting up without an active project or available media, follow the Avid Extension: Media Package Learning Resource guide to download a pre-prepared media package. This includes a couple of timelines from a Flawless-produced short film specifically for testing and demonstration inside Avid.
You have full permission to use this package to familiarise yourself with the visual dubbing workflow, and to understand how DeepEditor integrates with Avid. It’s an ideal way to get hands-on before using the tool with production material.
Support
If you encounter issues during the installation and setup, please contact support@flawless.app.
Uninstalling the Extension
You can remove the DeepEditor Avid Extension at any time.
On macOS:
- Open Spotlight and search for Uninstall Flawless DeepEditor Extension (you'll also find it in your Applications folder).
- Run the uninstaller.
- Review the notification, then click Remove.
- Enter your Mac login password (the one you use to unlock your computer, not your DeepEditor account) to confirm and complete the uninstall.

On Windows 11:
- Open Settings > Apps > Installed apps (searching "Add or Remove Programs" also gets you there), then search for Flawless DeepEditor Avid version 2.2.0.
- Click the options menu (•••) next to it and select Uninstall.
- Click Uninstall again to confirm, then click Yes when asked "Are you sure you want to completely remove Flawless DeepEditor Avid and all of its components?"
- The uninstaller will run and remove the extension.
To reinstall for either Mac or Windows, return to the Avid Extension: Installation and Setup page on the Knowledge Base and download the relevent file again.
Read next: Avid Extension: Creating Your Vub