-
Overview
-
Uploading to the Media Library
-
Selecting color space and frame rate
-
Renaming your media files
Overview
![]()
When using the Flawless DeepEditor Avid Extension, media is uploaded directly to the Media Library via the Extension. See here for guidance. Use the instructions below if you are vubbing through the web app.
If you have not already created a project in DeepEditor, do so using the guidance here.
The Media Library is your project’s central hub for managing all uploaded media and is housed in the Media tab for your project. It allows you to store, sort, rename and reuse media files. Every DeepEditor project has its own Media Library.
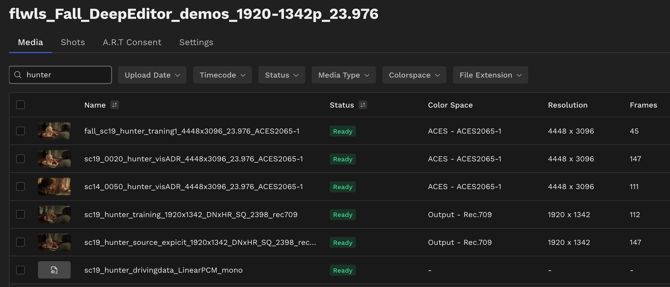
Once you have your media files prepared, you can upload them to the Media Library and use them to create a shot.
The media files in the Media Library serve one of three purposes:
-
Source media – the original performance you want to visually dub.
-
Driving Data – the new performance you want to apply to the Source media.
-
Training Data (optional) – additional footage of the same character to help improve image quality, if needed, as per the guidance here.
As media uploads, DeepEditor displays clear status indicators to show whether each file is processing, ready, or has encountered an error, making it easy to track progress and troubleshoot if needed.
Uploading to the Media Library
To upload your media files to the Media Library, click Upload Media from the Media tab, then choose one of the following:
-
From your computer (if uploading files less than 1 GB)
-
Simpy drag and drop the files into the Add Media window.
-
Do not use this option for EXR image sequences.
-

-
Via Media Shuttle (if uploading EXR image sequences or larger files (> 1 GB))
-
Make sure you have the free Signiant app installed.
-
-
-
Select Open Media Shuttle. You will be redirected to the Media Shuttle portal page.
-


-
-
Either drag and drop the folder containing the EXRs - not the individual EXRs themselves - into the Media Shuttle window, or Click in the window to add content and navigate to your folder.
-
You can only upload one folder of EXRs at a time.
-
Hit Submit when ready.
-


-
-
Once the Media Shuttle upload is complete, close the window in your browser, return to the DeepEditor Media Library and you will see the EXR image sequence.
-
Requirements for EXR image sequence uploads:
-
Timecode: Each EXR frame must have timecode metadata. If the sequence lacks timecode metadata, it will fail media validation. Frames with duplicated timecodes are also not permitted.
-
Naming: Each frame’s filename must include the frame number at the end of the filename e.g. my_exr_sequence_0000.exr.
-
Bit Depth: Both 16-bit and 32-bit float formats are accepted.
-
Compression: All EXR compression formats are supported.
Once uploaded - via either method - you will see the media in the Media Library and be able to scroll to the right to see all columns containing metadata.

Selecting color space and frame rate
Once you have uploaded your file, you need to confirm its color space. This ensures that the color profile of your vub output will match your Source media.
To choose a color space, simply click on the dropdown menu and select your preferred option. If you’re unsure which one to choose, refer to the color space and export settings of your editing project, or confirm with someone who does know..
Note: Files can be uploaded to DeepEditor before or after color grading or applying a LUT. However, for Final quality vubs we recommend uploading ungraded files when possible, as any color decisions made beforehand will be baked into the output renders.
If you have uploaded an EXR image sequence, you will also need to confirm the Frame Rate of the image sequence. Select the correct option from the frame rate drop-down menu.
Renaming your media files
Once you have uploaded your files, they can be renamed as desired by clicking the 'pen' icon next to the name.

Read next: Shot Creation