Table of Contents
Overall Requirements
Uploading EXRs
Exporting and Downloading EXRs
Troubleshooting EXR Issues
Overall Requirements
Make sure you have the free Signiant app installed before uploading and downloading EXR sequences in DeepEditor.
Uploading EXRs
Requirements
- Timecode: Each EXR frame must have timecode metadata. If the sequence lacks timecode metadata, it will fail media validation. Frames with duplicated timecodes are also not allowed and will cause a failure.
- Naming: Each frame’s filename must include the frame number before the file extension, e.g., my_exr_sequence_0000.exr.
- Bit Depth: Both 16-bit and 32-bit float formats are accepted.
- Compression: All EXR compression formats are supported.
- Color Space and Frame Rate: After the upload is complete, you must manually set the color space and frame rate of the media within DeepEditor.
Step-by-Step Instructions
- In the Media tab within your project, click Upload Media then Open Media Shuttle. You will be redirected to the Media Shuttle portal page.
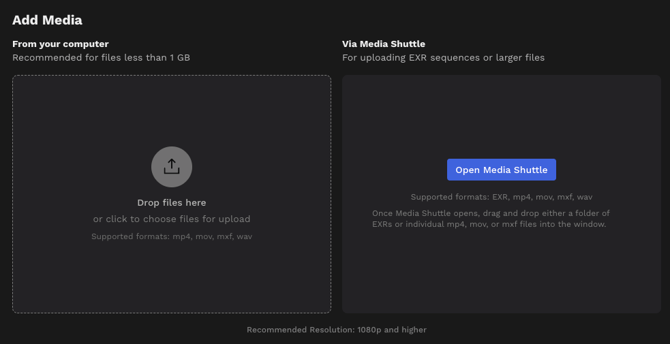
- Add the folder containing your EXR sequence into the Media Shuttle window
- Upload sequences as folders, instead of frames
- Upload only one folder at a time
- Click Submit to begin the upload process.
- Once the upload is complete, close the Media Shuttle window and return to DeepEditor.
- Set the color space and frame rate of the uploaded media.
If you have uploaded proxy media and created a shot and then want to add an EXR sequence as your online source media file, you can also upload this from within the Shot Media page. To do this:
- Go to the Shot tab and click on the shot you want
- Select Add Source
- Click on Via Media Shuttle and then Upload via Media Shuttle.
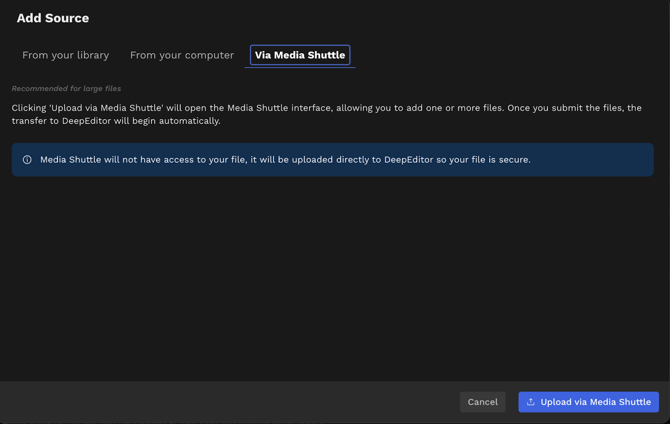
- When the Media Shuttle portal page opens, add the folder containing your EXR sequence into the Media Shuttle window.

- Upload sequences as folders, instead of frames
- Upload only one folder at a time
- Click Submit to begin the upload process.
- Once the upload is complete, close the Media Shuttle window and return to DeepEditor.
- Set the color space and frame rate of the uploaded media.
If you wish to upload an EXR sequence as Driving Data or Training Data, you can also do this via the Shot Media page. Just select Add Driving Data or Add Training Data and follow steps 3 to 7 above.
Exporting and Downloading EXRs
Requirements
- Source Material: To export an EXR sequence, you must have a Final quality vub.
- Timecode, Naming, Compression: The exported EXRs will retain the timecode and metadata from the source sequence.
- Color Space and Frame Rate: The exported EXRs will retain the color space and frame rate from the source sequence.
Step-by-Step Instructions
- By default, if you uploaded an EXR sequence as your source and generated a Final Vub, an automated EXR export will be generated once your Vub is complete.
- After refining your vub, you can export in one of two ways:
- On the Refinement page press Export Latest Render
- On the Vubs tab, select the relevant vub, click Create Export.

3. Choose your preferred export options:
- Video
- Image Sequence
- VFX Turnover Package
4. The first time you initiate the download, the dialog may disappear while the export package is being generated. Simply press Download and Proceed to Media Shuttle again. You will then be taken to the Media Shuttle portal page to download your EXR output.
Troubleshooting EXR Issues
- Missing Timecode: If your sequence lacks timecode metadata, it will fail media validation. Ensure your frames are properly exported from your DCC or pipeline tool.
- Duplicate Timecode: Duplicate timecode will fail media validation. Ensure your frames have unique timecodes.
- Naming Conventions: Always include frame numbers in the filenames before the file extension to ensure proper sequence recognition. Failing to do so, will result in the EXR sequence failing media validation.
- Folder Structure: Only upload entire folders containing the sequence. Do not upload individual frames separately.
- Signiant App Issues: If you encounter issues uploading or downloading via Media Shuttle, ensure you have installed the latest version of the Signiant app and that it is running correctly.