-
Overview
-
Playback Controls
-
Used Viseme and Advanced Controls
-
Timeline Zoom
-
Time Display
-
Go to Frame
-
Playback Keyboard Shortcuts
Overview
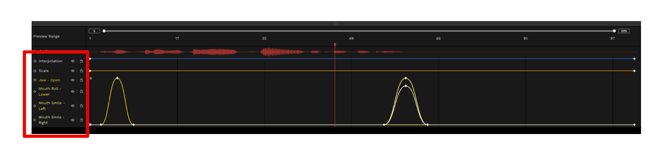
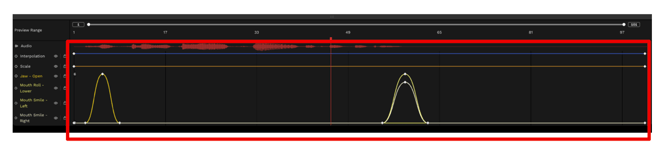
The timeline shows all keyframe adjustments as they are created and modified. You can see:
- Audio waveform
- Viseme keyframes
- Advanced (blendshape) keyframes

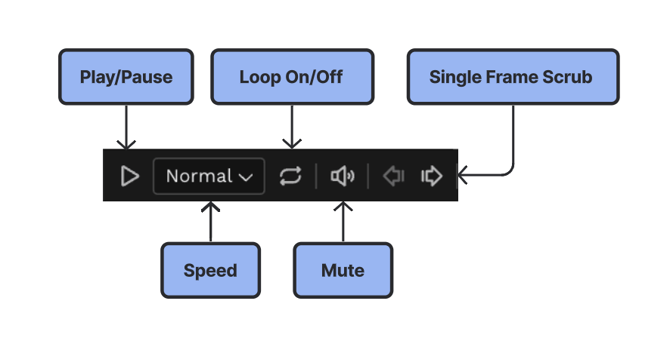
Playback Controls
Located at the top left of the timeline. Here you can:
- Play/Pause
- Loop On/Off
- Scrub by a single frame
- Change the playback speed
- Mute the audio
Used Viseme and Advanced Controls
As you add viseme and advanced controls overrides, they will appear to the left of the timeline, each with an individual color for easy identification.
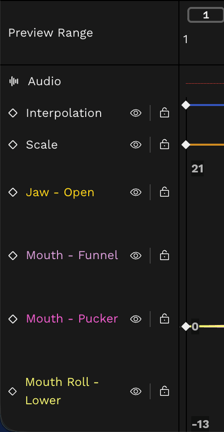
Click the eye icon to hide/view a blendshape.
Command + click the eye icon to solo a blendshape.
Click the lock icon to lock a blendshape.
Your viseme and keyframe adjustments are displayed inside the timeline.
Timeline Zoom
![]()
You can zoom in on a specific frame range on the timeline using two methods:
- Click and drag either end of the zoom bar.
- Type the desired frame numbers in the boxes at the ends.
Time Display
The timecode and frame counter of your current playhead position are displayed in the top right corner of the Timeline, along with the frame rate of your source media.

Go to Frame
Click on the frame count display to type the specific frame number you'd like to jump to. The playhead will move to that frame when you press Enter.

Playback Keyboard Shortcuts
- Spacebar = Play/Pause
- K = Pause
- L = Play
- Right/Left Arrows = Move playhead right/left one frame with audio scrubbing (i.e. you hear the audio of each frame that you land on).
- Option/Alt + Right/Left Arrow = Move the playhead right/left 10 frames
- Up/Down Arrow = Jump to the first/last frame